Create an outbound warehouse order (video/article)
Create a new outbound warehouse order using Order Management in Lineage Link.
Who can use this capability? Lineage Customers
This article covers:
- Create an outbound warehouse order- video included
Create an outbound warehouse order
This video overview covers the basic workflow for creating an outbound Warehouse Order request, from a Lineage warehouse location. In addition, the outline below this video overview covers additional details for more context beyond the basic workflow shown in the video overview.
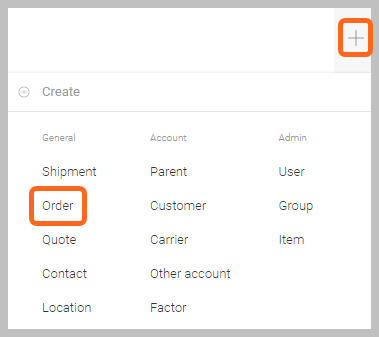
To create a new warehouse order, click the plus (+) icon in the upper right-hand corner to display the Create menu, then click the Order button.
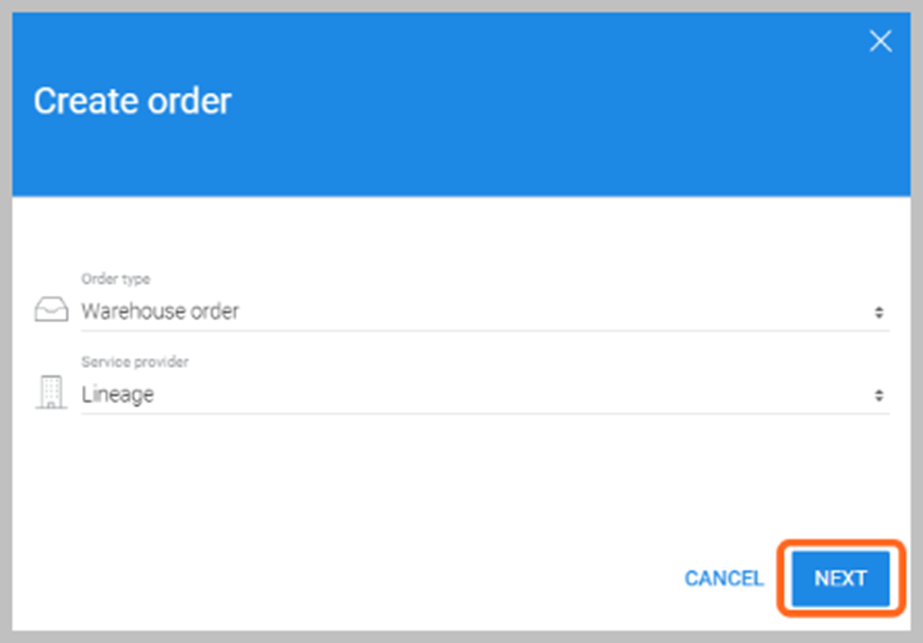
A modal window will display; Select the following criteria, then click NEXT to proceed.
- Order type: Select Warehouse Order.
- Service provider: Ensure Lineage auto-populates as your service provider.

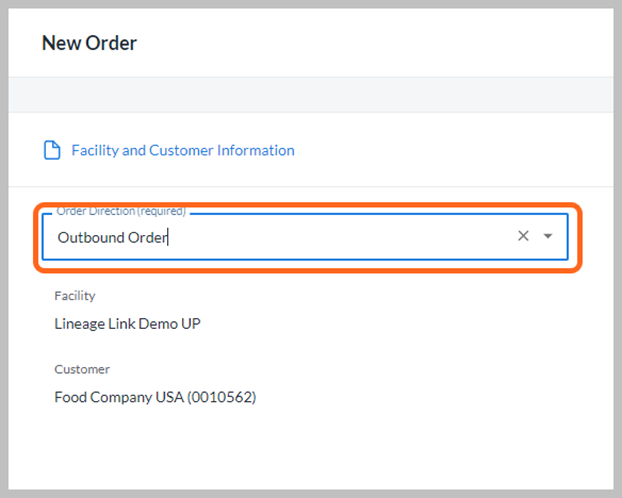
Once on the OMS page, select the Facility and Customer Information outlined below then click NEXT to proceed.
- Order Direction (required): Choose Outbound Order.
- Facility (required): Enter a warehouse location name and select the appropriate Lineage facility. Note: If you only do business at one location, it will default to that Lineage facility.
- Customer (required): Ensure the displayed Customer (your account name) is selected.
In the Order Overview section enter the following information then click NEXT to proceed. Pro-tip! Using the tab key is a quick way jump to the next field.
-
Destination Location (required for outbound orders): Type a location name, street address or consignee number to look up a destination for the order and select it from the search results.

-
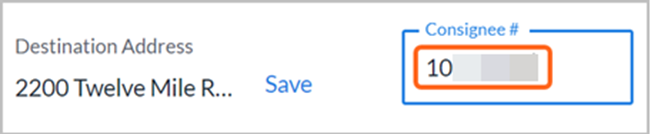
Consignee #: Enter a consignee number only if your customer requires an Advanced Shipping Notice (ASN #). Note: If an order is for transportation (LNTS), the consignee # must be entered correctly. Please contact Customer Service at the facility, if you are unsure which consignee should be used.
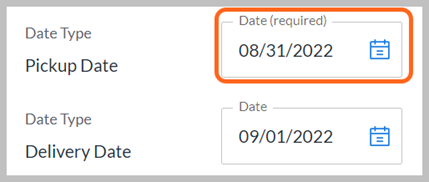
- Pickup Date (required): Enter the requested pickup date for the order.
- Delivery Date (optional): Enter the requested delivery date if applicable.
-
ID Value (required): Enter the sales order number for an outbound order. Note: Include additional references by clicking the plus (+) Add ID button.

-
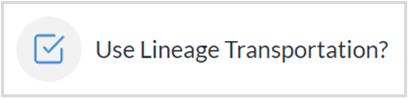
Use Lineage Transportation? (optional) If your order needs to use Lineage Transportation, check this box. If the option to utilize Lineage Transportation is not displayed, contact the Lineage Transportation Team directly for assistance. Note: If using Lineage Transportation (LNTS) for an order, please ensure the consignee field (mentioned above) is filled in and accurate.
-
Carrier (optional): If needed, or you know the carrier for the order in advance, enter the company name or SCAC code, then select the appropriate carrier from the search results.

- Payment (optional): If needed, select the payment type.
-
Pallet (optional): If needed, include pallet information on the order. Note: When the pallet field is unavailable; Add pallet info. to the Order Notes field, as needed.
-
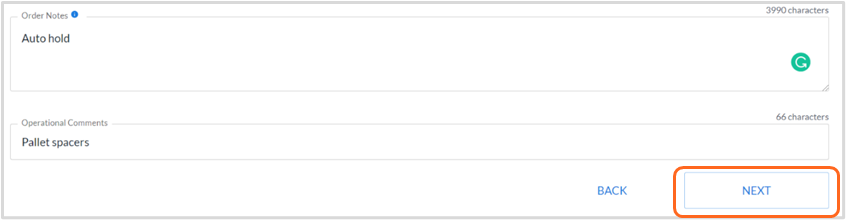
Order Notes (optional): An open text field to add comments to the order. Order notes will appear on the MBOL.


-
Operational Comments (optional): Open text field to enter operational notes on the order.

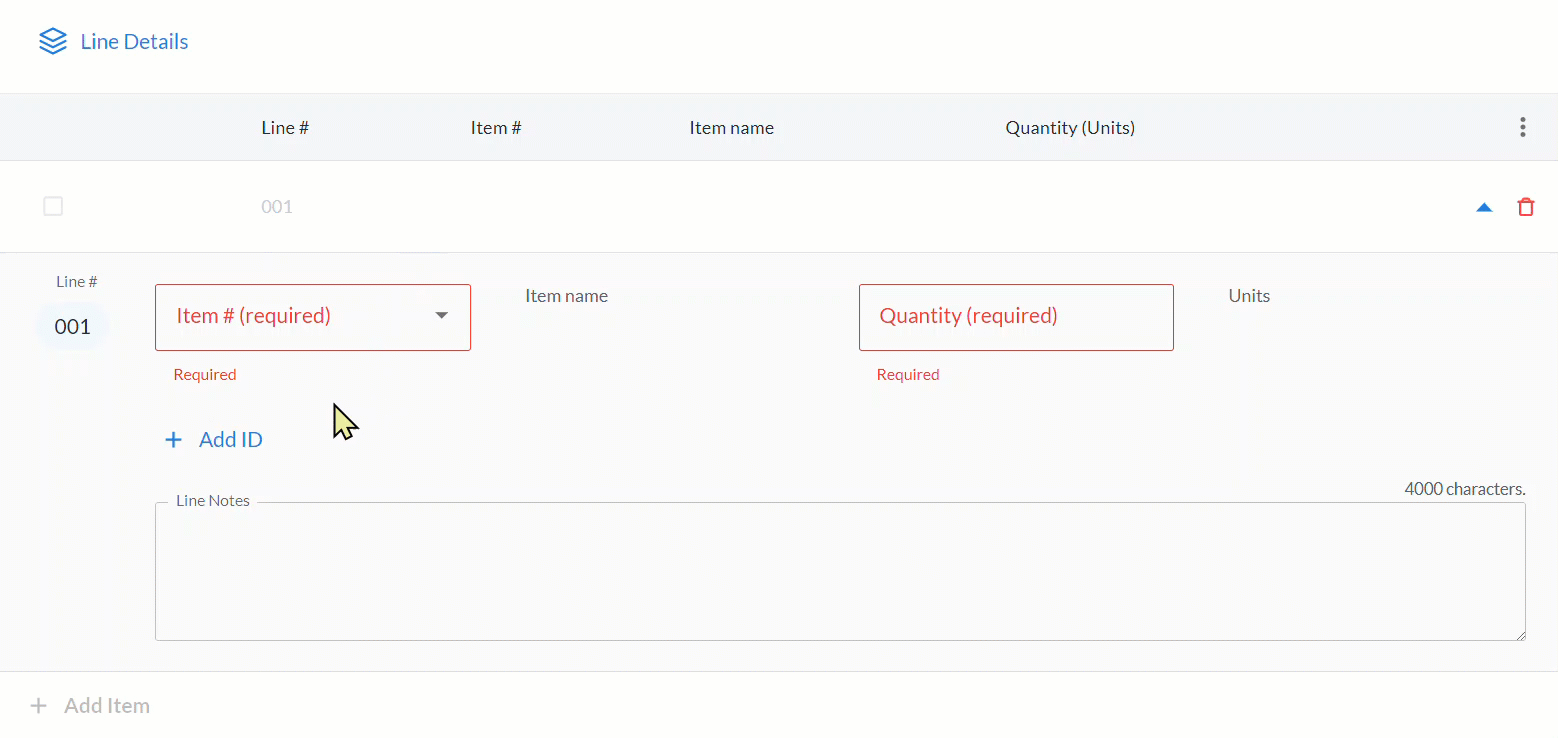
In the Line Details section click the plus (+) Add Item for each line you need to request on the order. Enter the following information for each line you’ve added, then click FINISH to see a summary of your order request before submitting it to Lineage.
- Item # (required): Look up the line item you need to add by the item ID number, item name, or item description, then select it from the results. Note: If needed, the + Add ID button (mentioned below) will allow you to search for the item by lot/pallet, instead of by Item #.
- + Add ID button (optional): Look up line items by additional references (e.g., Pallet, Lot). Additional reference types available in the drop-down menu will vary depending on the Lineage facility that is selected on the order. Once you select a reference, it will auto-populate the Item # and associated information. If needed, you can also manually enter an additional reference (pallet/lot). Note: This does not allocate a specific lot/pallet, it is only to submit it as a request on the order.
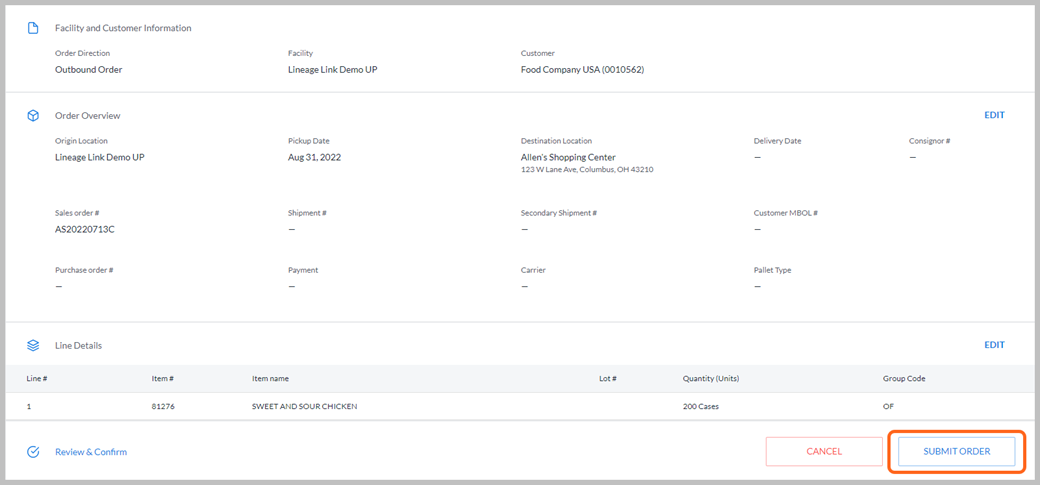
Important! A ribbon with the Order # will display at the top while the order is processing; Wait for the ribbon to clear. Once the ribbon clears, the order has made it to the warehouse and within minutes will be visible in Lineage Link where you can monitor its progression in real-time.
