Intro to inventory (video/article)
This article is for beginners who are looking to learn how to navigate the basics of Inventory within Lineage Link®.
Who can use this capability? Customers; Lineage
This article covers:
- Introducing inventory visibility (video)
- Navigating inventory quantities
- View item traceability details
- Access to enhanced inventory reports
Introducing inventory visibility
A video for users who want a quick navigation overview of Inventory features within Lineage Link®.
Navigating inventory quantities
A summary of important features on the Inventory page and basic navigation. If needed, click a section to skip ahead or walk through the breakdown of each feature below.
- Inventory summary
- Balance type definitions
- Column customization
- Sorting information
- Unit of measure
- Filter criteria
- Grouping inventory
- Traceability details (right-hand-pane)
- Subtotal
- Download a spreadsheet
Inventory summary
To view a summary of your item quantities, select Inventory from the left navigation bar.
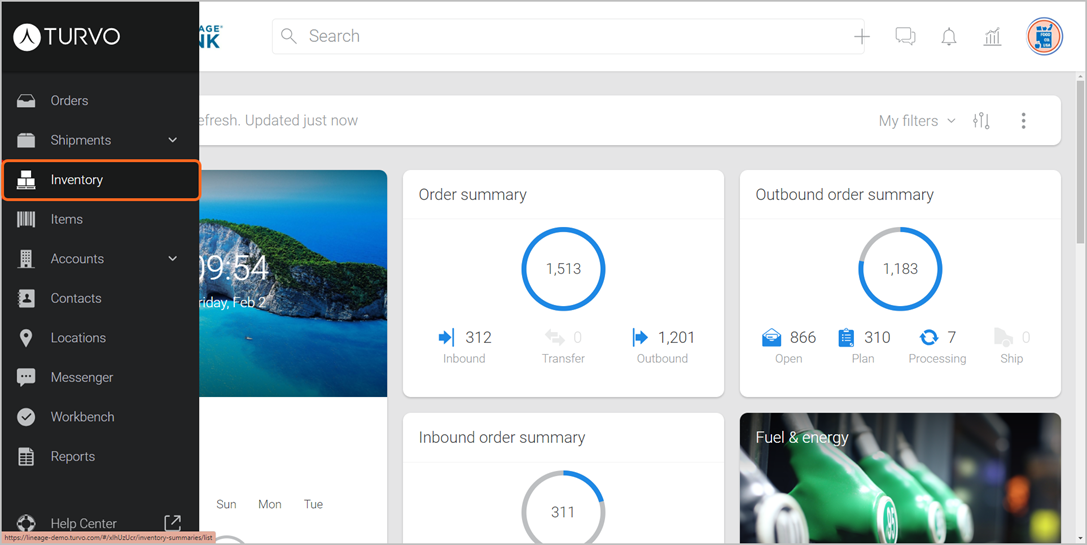
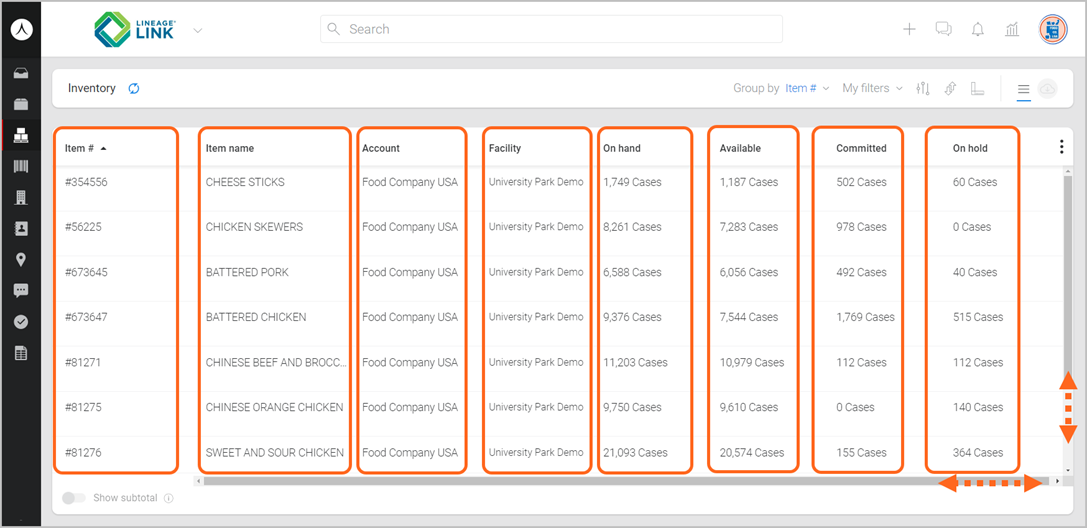
Once on the Inventory page, you will see a list of items separated by columns.
Balance type definitions
Item quantities are broken down by balance type and definitions are outlined below, for reference.
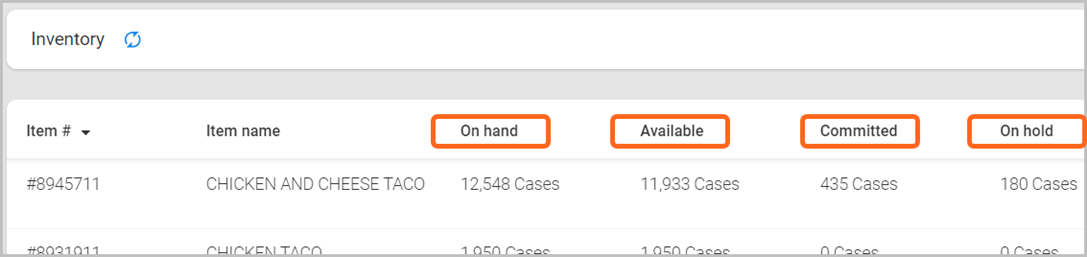
- On hand: The total quantity of this item at a Lineage facility. On hand totals are made up of the Available, Committed, and On hold quantities.
- Available: Quantity available to order.
- Committed: Quantity planned on orders and has not yet shipped out from Lineage.
- On hold: Quantity currently on hold, and not available to put on an order. Note: For more information regarding a hold, please contact the facility directly through Customer Service.
Column customization
Below is an outline of customization options for your Inventory page. Note: Adjustments you make will stay that way for the next time you sign in to your Lineage Link profile.
-
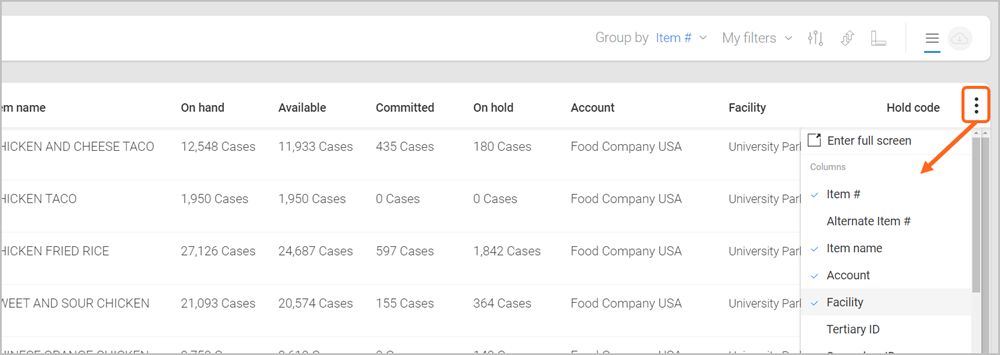
Show/hide a column: Select the 3-dots icon to view the list of columns you have available to show or hide. A checkmark indicates the column is visible. Select a column name from the list to add or remove a checkmark, depending on what data you’d like to display.
Pro-tip! Lineage does not process data for the following fields and we recommend hiding these columns: Damaged; Depleted date; Days on shelf at delivery; Owner customer code; Storage location; Supplier product code.
-
Re-arrange a column: Click a column header then drag and drop it left or right. Note: The first column cannot be moved and will remain as the primary column the data is prioritized by, depending on how you have selected to view/group information (e.g., by Item ID/Pallet ID).

-
Expand hidden text in a column: If you notice there is hidden text or characters within a column, re-size the column by hovering between the headers and then click and drag it to the right to expand and view more.

Sorting information
Unit of measure
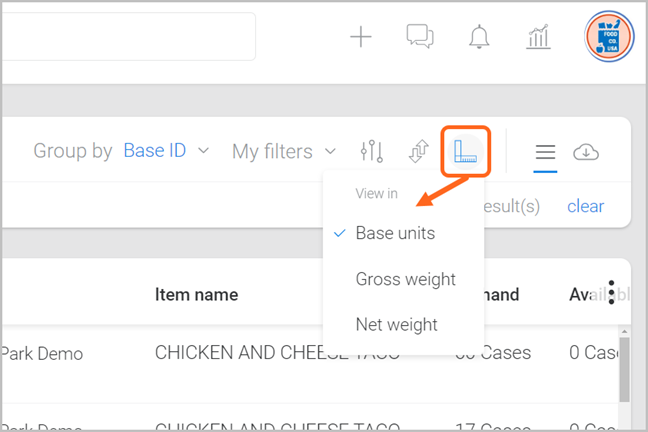
To view quantities in another unit of measure, click the ruler icon and select one of the ‘View in’ options listed in the drop-down menu (definitions below).
- Base Units: The standard unit of measure used for items will be displayed by default. Most common base units are in cases, but some accounts might have a barrel, drum, tote, or carton.
- Gross weight: Total weight for the items including packaging.
-
Net weight: The total weight of the contents, not including packaging.
Filter criteria
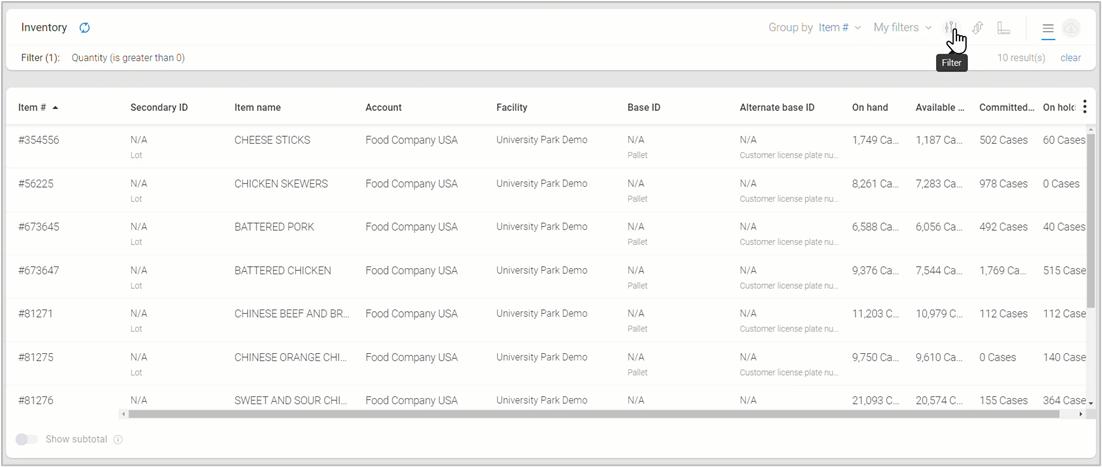
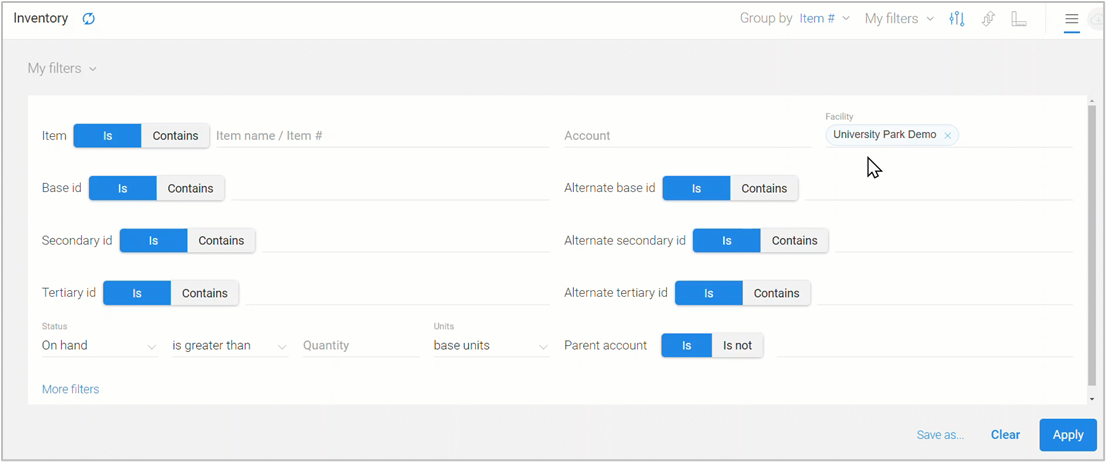
As needed, click on the Filter icon to view the rest of the fields that you can use to narrow down the inventory list and search for key information. Select More filters to see additional criteria (e.g., Hold code, Received date).
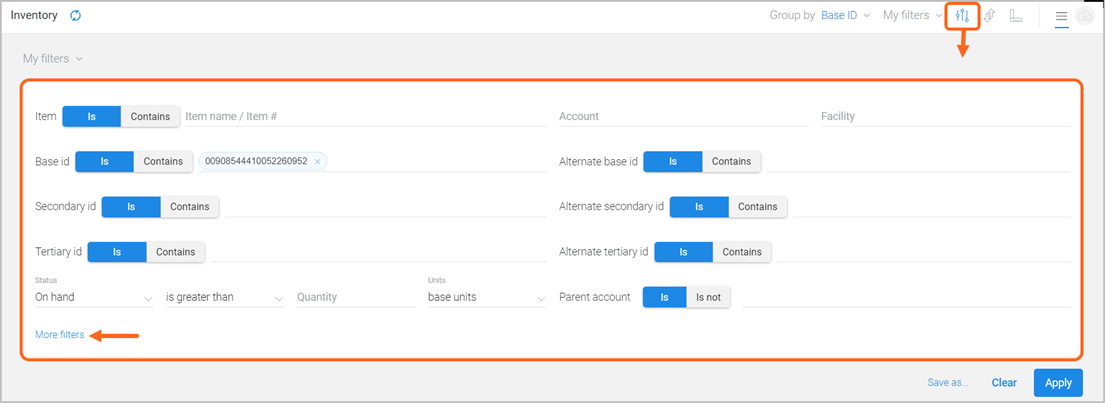
For example, if you need to see on hand items stored at one or more Lineage locations, enter the warehouse name(s) in the Facility filter, select the facility from the results, then click APPLY.
Pro-tip! Once you have the filter criteria you need selected, save it for reuse later by clicking Save as, name the filter, and click the checkmark icon to confirm.
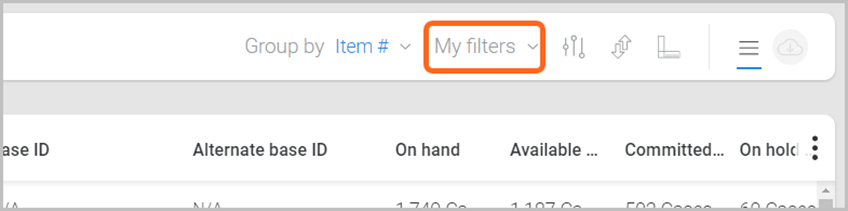
Any filter criteria you’ve saved in the past, are stored in the My filters drop-down menu. Note: The filters you use are custom to your user account and will not be accessible to other users. If another user would like to have the same criteria set up, they need to create the filter when signed in to their account.
As needed, click clear to reset your inventory page back to the default view of all items. Otherwise, the previously used filter will remain applied to the page as you navigate, and will also remain applied for the next time you sign in.

Grouping inventory
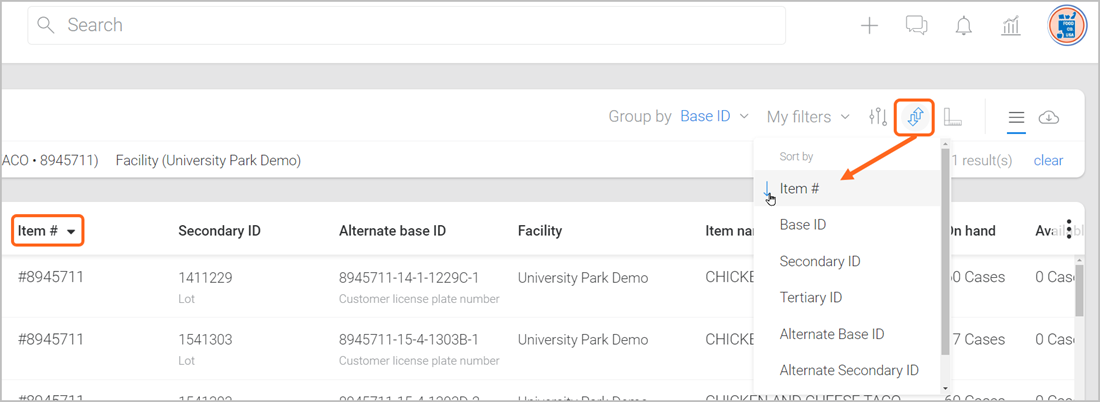
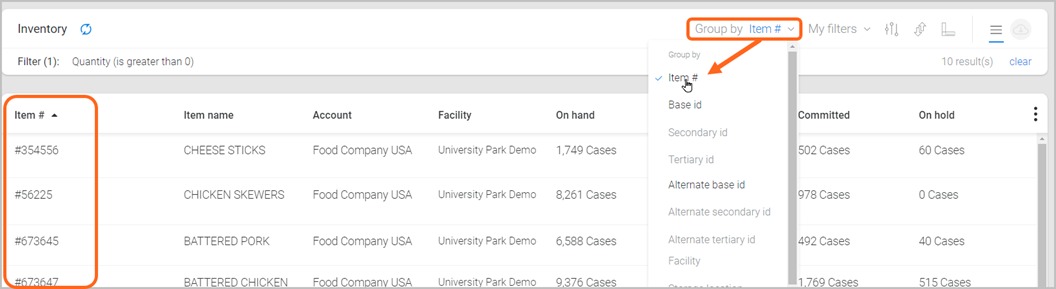
Located at the top-right of the Inventory page, is a ‘Group by’ menu, with options to view information based on how you track your item quantities (e.g., by Facility/Pallet ID/Lot ID). Note: Grouping options can vary based on other filters that are selected.
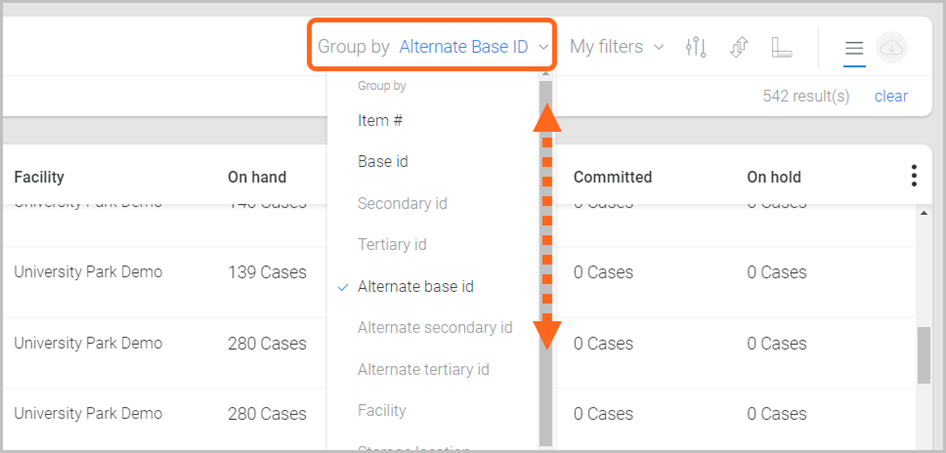
For example, when Item # is selected as the Group by option, this becomes the first column, and the information shown is then prioritized and listed by Item #.
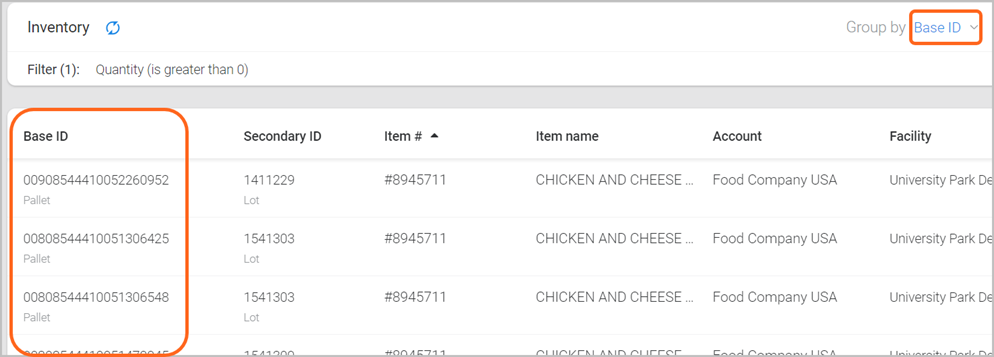
Another example is to Group by the Base ID or Secondary ID, to see item quantities broken down by a specific traceability ID, depending on how your items are managed. For more information regarding traceability IDs and how they are set up for an item, please see the View item traceability setup section of this article.
Traceability details (right-hand-pane)
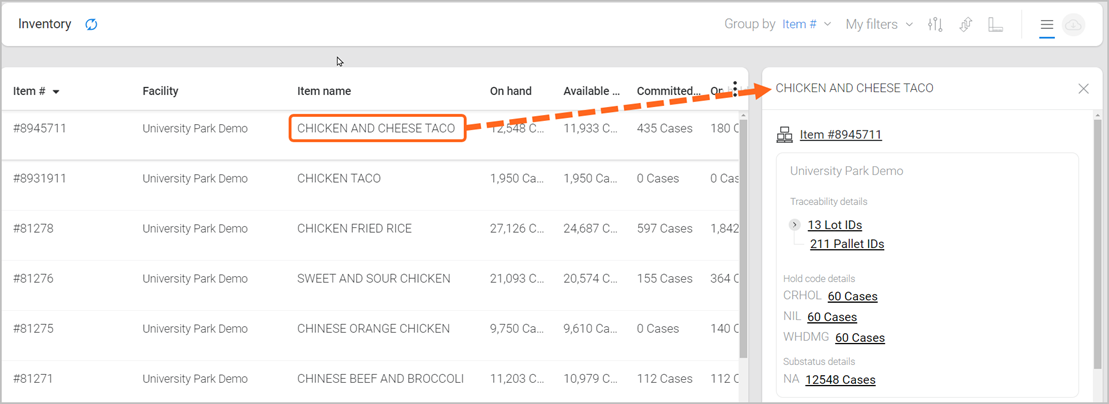
Click an Item name to display a quick breakdown of traceability information in the right-hand-pane.
Clicking on a link within the right-hand-pane of an item will take you to a breakdown of item quantities based on the ID or reference selected. For example, selecting # Pallet IDs will group all the on hand quantities for the item selected, and break them down by each pallet ID.
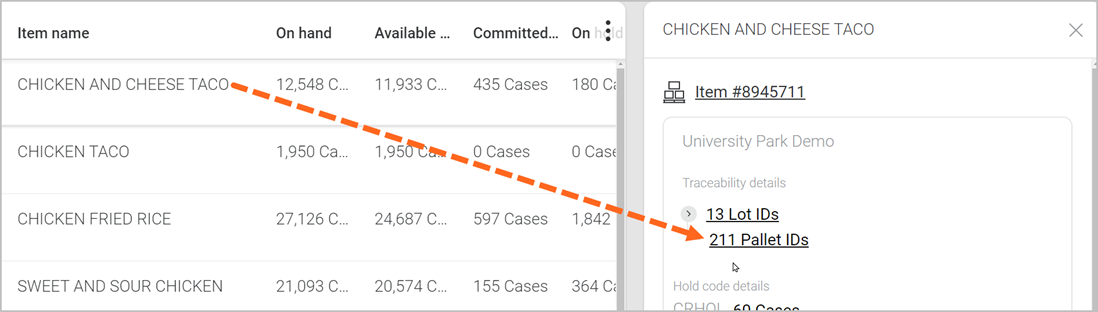
Note: Clicking on a link in the right-hand-pane of an item will also automatically apply any associated filter criteria/grouping to the page and will remain applied until you clear the filter or adjust the selected filter criteria manually.

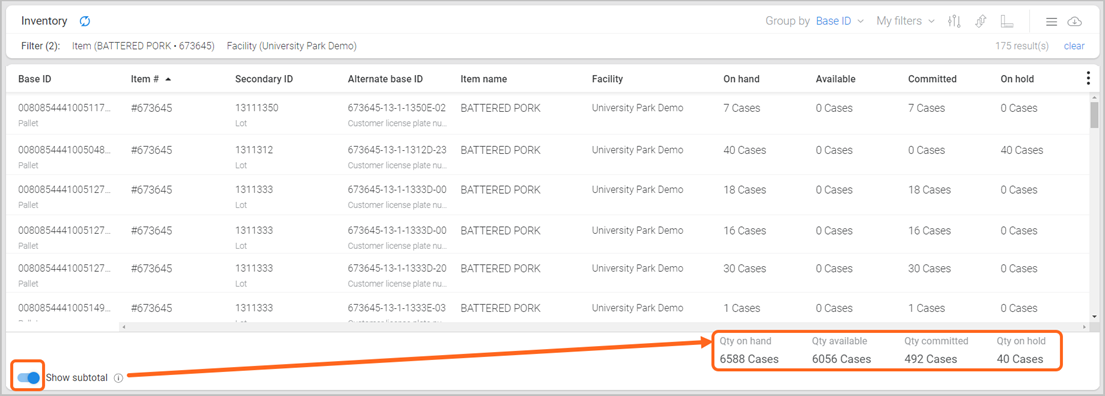
Subtotal
To display a total of on hand quantities, select the Show subtotal toggle (bottom-left). Note: A filter or group by option may need to be applied first to narrow results before viewing the subtotal.
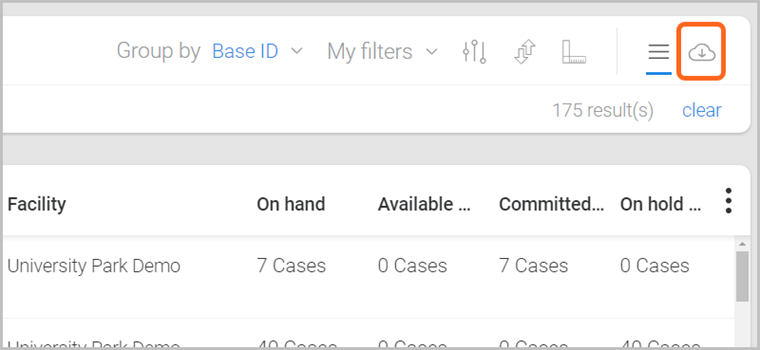
Download a spreadsheet
Use the download icon at the top-right of the inventory page to export data to an Excel spreadsheet (a maximum of 1000 results can be exported). Note: Apply a filter to narrow down key information and limit results before exporting.
View item traceability details
Each item ID has records associated with key information, such as its orders (active/historical), timeline history, traceability details with reference numbers, dimensions, and more. For additional questions regarding item setup, contact Customer Service at the appropriate Lineage facility.
If needed, click on a section in the outlined features below, to skip ahead.
- Search for an item
- View item traceability set up
- View item updates on a timeline
- Monitor orders associated with an item
- Review item attributes
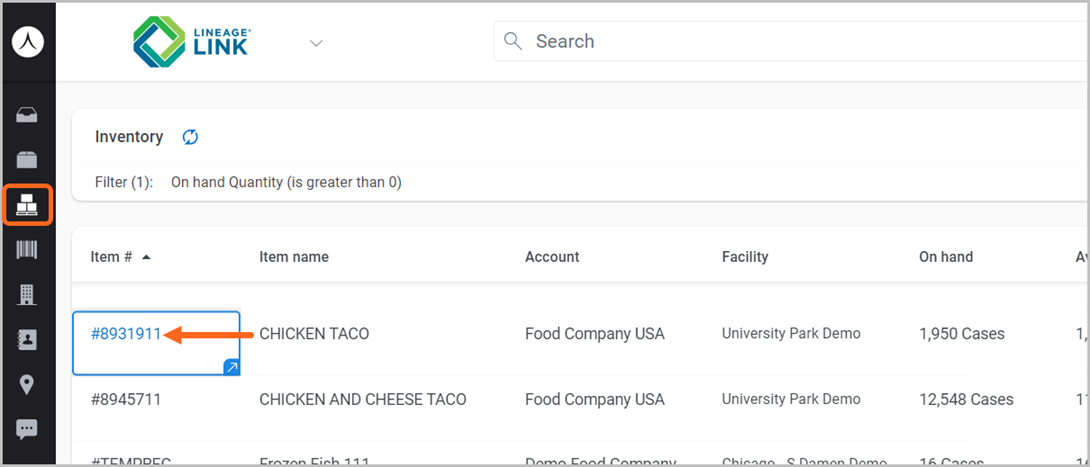
Search for an item
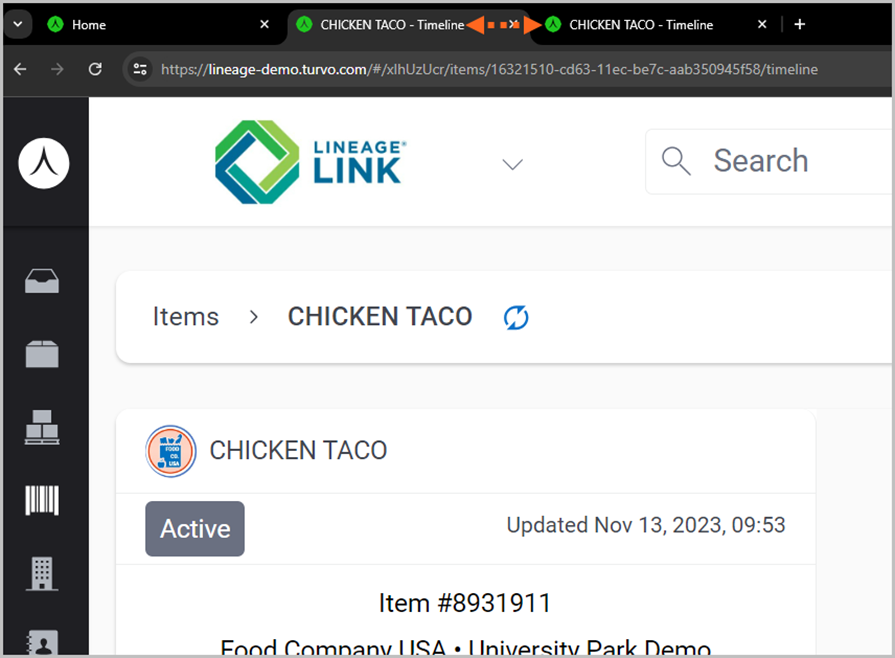
From the Inventory page, when viewing a specific item, click the Item # to navigate over to the associated records, and from there you can drill in further.
Another quick way to find item records is to click the Global Search bar, select the Items filter, type an item number, or name, and then select the appropriate search result from the Items category.
Pro-tip! An item may have more than one record associated with it, depending on how information was captured upon receipt. The best way to view the details of an item is to open each record available by item ID, in separate browser tabs or windows, then look across records to view information captured on each (e.g., orders, dimensions).
View item traceability setup
When looking at inventory, it is helpful to understand how item traceability is set up and the various references available for an item (e.g., Base ID = Pallet ID).
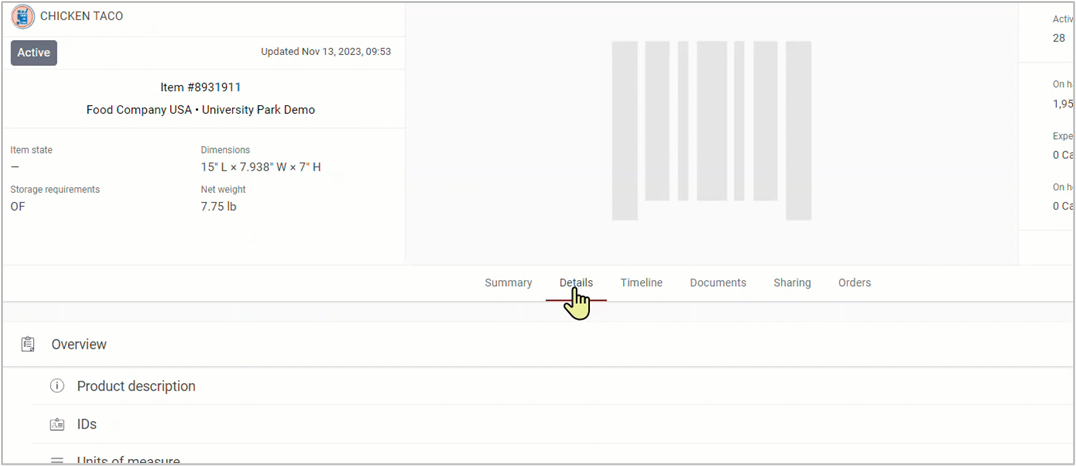
To view how reference IDs for an item are set up, click the Details tab and select Item traceability to expand the segment.
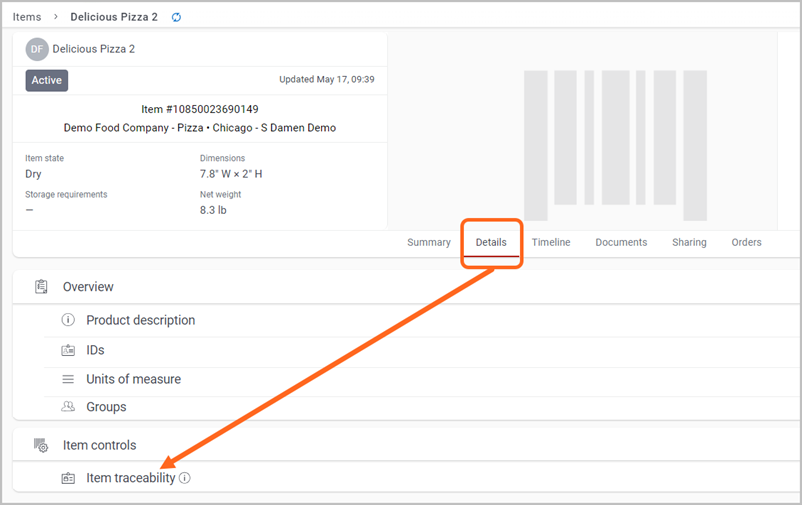
For example, within Item traceability, you can see how each ID is set up for an item depending on the way it is tracked (e.g., Tertiary ID is set up as the ‘Production Date’ on this item). Note: The associated columns on your Inventory page, will reflect the same information you see set up here.

Standard Traceability IDs: Most common references for item setup and traceability IDs.
- Secondary ID: Most commonly, set up as the Lot ID or a certain time of batch reference number for stock that shares a specific reference ID.
- Base ID: Most commonly, set up as the Pallet ID or a type of packaging/material that helps to store and transport goods.
-
Tertiary ID: An optional reference, that may be set up for items at select Lineage locations that require a unique tracking method based on the customer/facility requirements (e.g., production date, code date).
Custom Traceability IDs:
- Alternate Secondary ID: Customer-specific reference IDs associated with how you track specific lots, etc. (e.g., by customer license plate number, customer lot reference, etc.).
- Alternate Base ID: Customer-specific reference IDs associated with how you track specific pallets, etc. (e.g., by customer license plate number, customer pallet ID, etc.).
- Alternate Tertiary ID: Customer-specific reference IDs associated with how you track specific information (e.g., by customer reference ID/code.).
View item updates on a timeline
Select the Timeline tab to view a quick summary of events or changes that have occurred with an item. Timeline history is separated by a date header and each update has a timestamp.
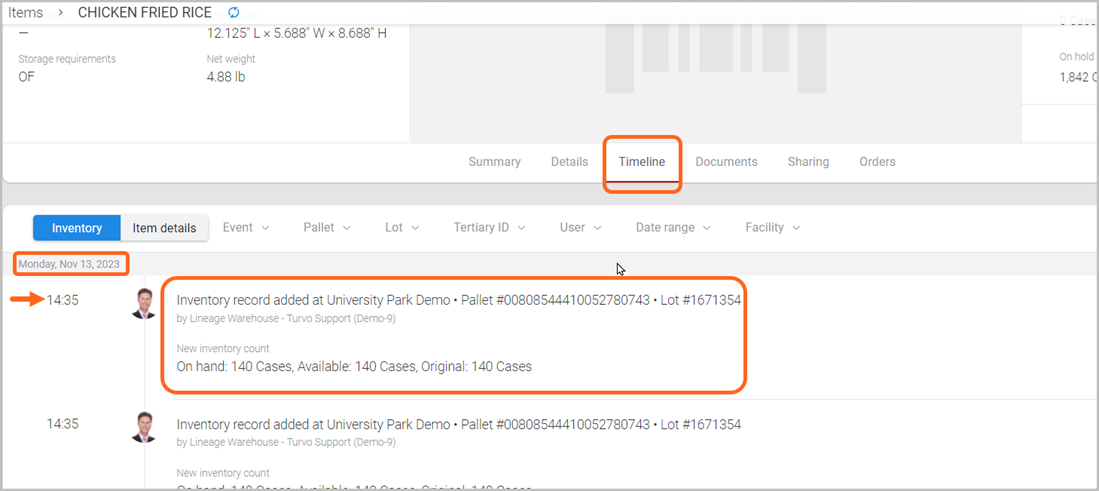
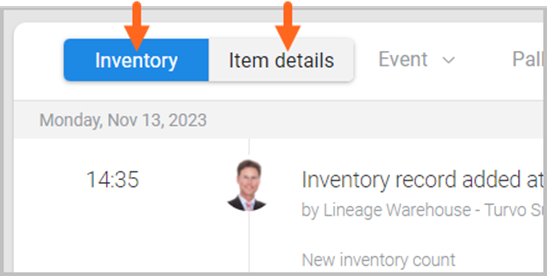
The item timeline gives you the ability to toggle between different types of history by selecting Inventory or Item details.
- Inventory: Provides you with an overview of recent changes to inventory at a Lineage warehouse location (e.g., Inventory added, count changed, holds).
-
Item details: Provides you with insight into updates made to the Item Master detail (e.g., key attributes, product information).
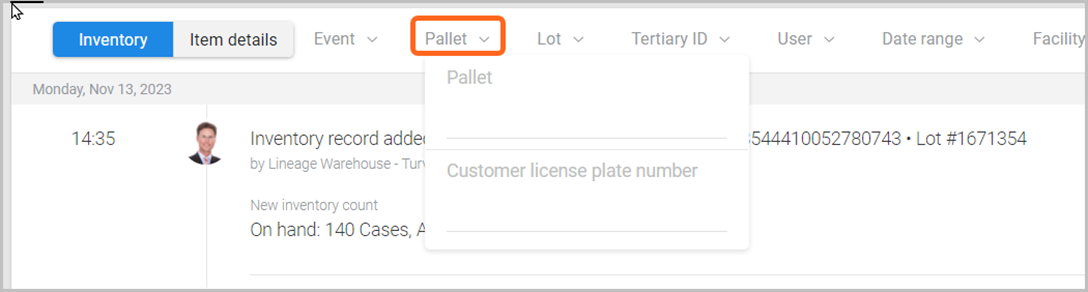
As needed, select a filter option at the top of an item Timeline and enter in the appropriate reference to narrow down specific events (e.g., Pallet ID).
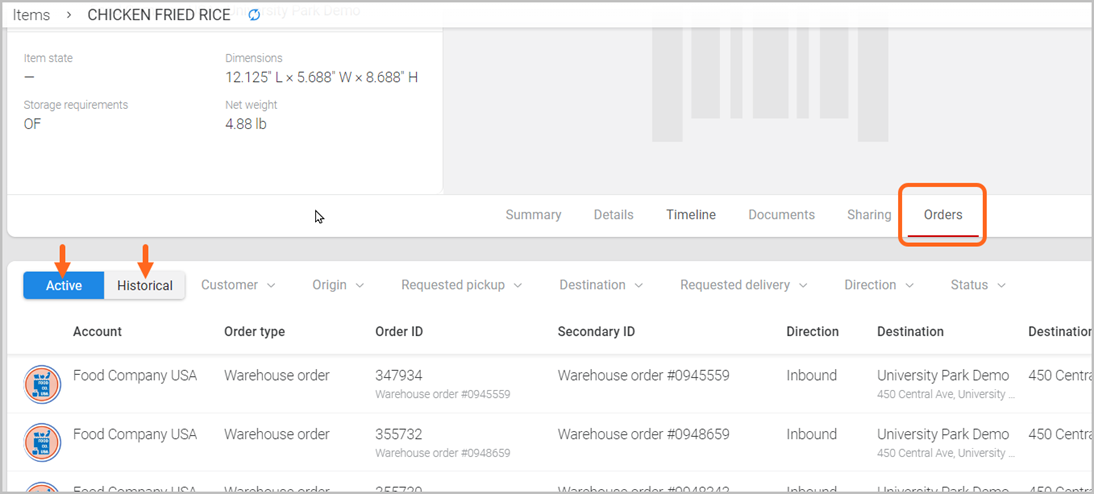
Monitor orders associated with an item
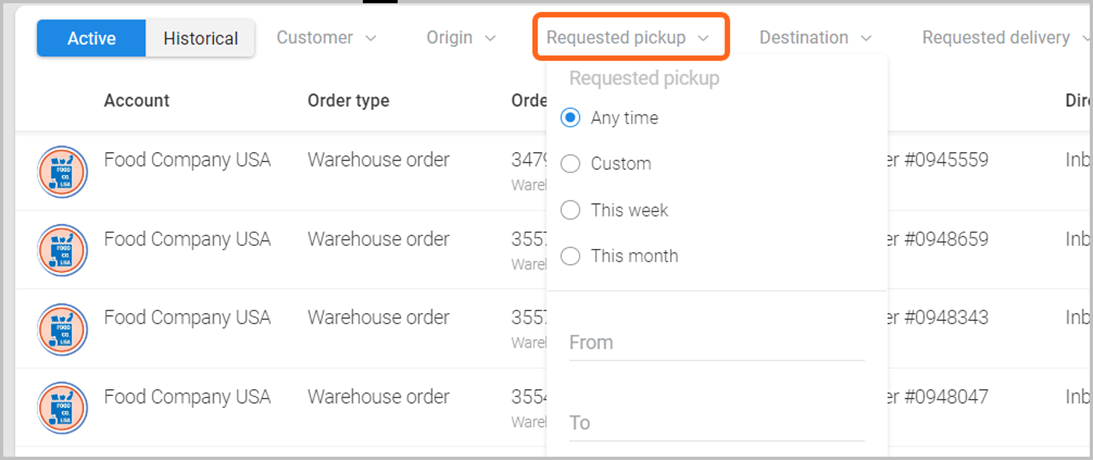
As needed, apply a filter option to narrow down one or more orders. For example, to narrow down orders that you originally requested to be picked up from Lineage within a certain date range, select the Requested pickup filter and choose or enter a date range.
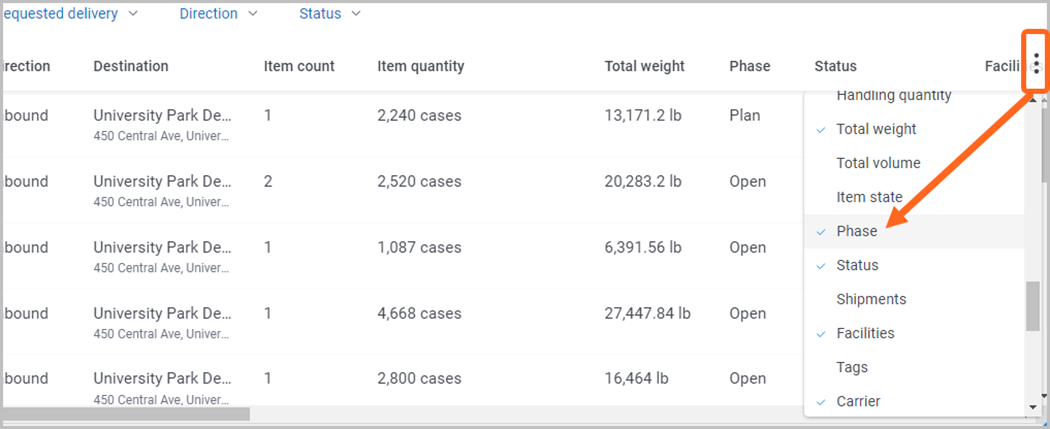
As needed, click the 3-dots icon and select the columns you’d like to display/hide.
Review item attributes
To view item description, dimensions, weight, or storage requirements that were recorded upon initial setup, click the Details tab and select a segment within the Overview section to expand the details.
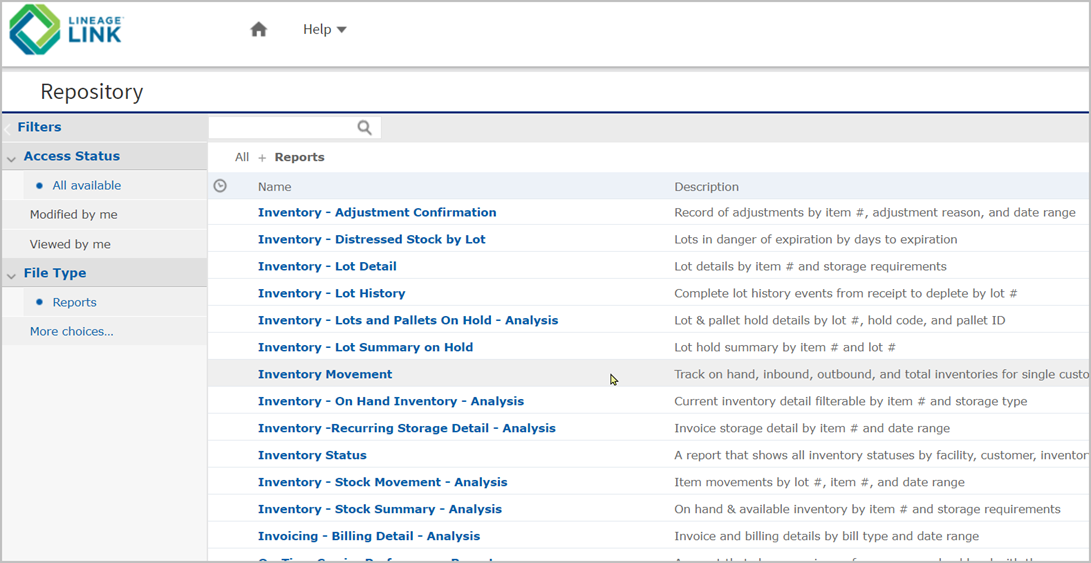
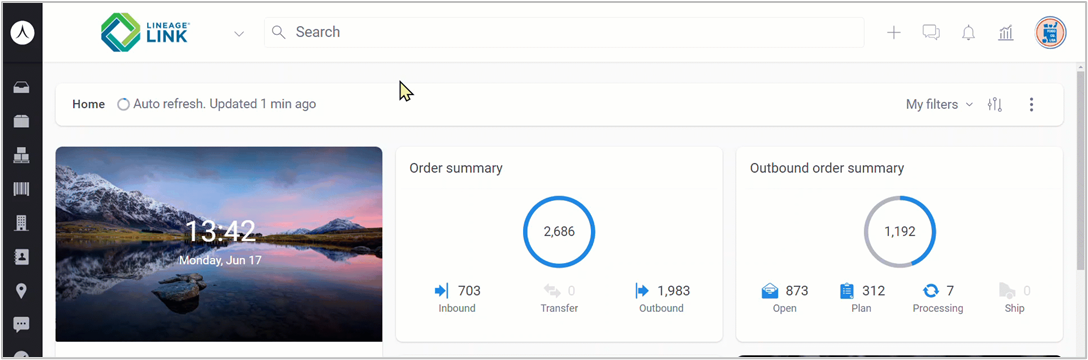
Accessing inventory reports
Clicking on the Lineage Link logo (top-left) will expand the shortcuts menu. Click on Lineage Reports to open the reporting page. Note: Report availability will vary depending on the facility.
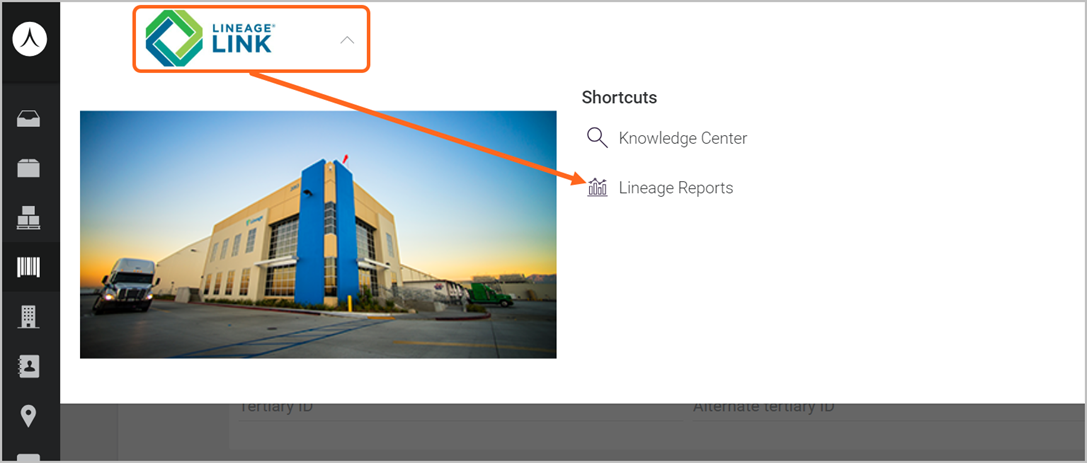
Select an inventory report name to access it, then choose the information you need to run the report data for. For additional information, see the Lineage Reports learning path.